Recently, we sat down with Brandon Habin, an engineer with Alden, to discuss the importance of precision in manufacturing.
What do you do at Alden?
I work with a department that builds, tests, and optimizes systems primarily dealing with water, such as water for power generation, wastewater treatment, etc. A lot of the work that the Fluid System Performance department does is centered around the nuclear power industry. We typically construct a scale model of a system component—like a pump intake or the emergency core cooling system sump strainer at a nuclear power plant—and then test the design, analyze the results, potentially optimize and re-test it, then send the results back to our clients.
Tell me about the model development and creation process.
Usually the client will send us drawings or actual parts that are identical to the manufactured version of the test article. We then use a series of model similitude scaling techniques to construct a model or test article at a smaller scale while retaining the accuracy against the original.
Do customers send you the original CAD designs for inspection in addition to the part for testing?
Oh yes, almost always. Typically we receive DITs (design input transmittals) containing drawings and documentation—either 3D or standard. Under our 10CFR50 Appendix B Nuclear QA program, we’ll inspect test articles received by the client or constructed by Alden to ensure they match up to the requirements in the associated drawings.
Are there cases where the OEMs will produce and provide the model?
Typically, Alden develops the model and the client may supply a test article for the model. We can and do produce the test articles for the model in many instances. There are certain aspects that are critical to the test results that the client may not consider if they’re not experienced in creating models. Alden works with their clients to bridge this gap. If they are interested in a scaled down model the client typically sends it to us and we—using our engineering expertise and judgment—will determine what the scale factor should be.
If a part has a coating or finish, would that also be scaled to match? How does that work when there are delicate finishes and thin layers involved?
To account for details like surface coatings, we first ask ourselves “Is it critical to overall quality or performance?” If the answer is yes, and it’s something we need to test and account for, we’ll incorporate it in the model and scale it if necessary. We then determine what level of precision and accuracy is required based on the end results we’re trying to achieve. Tolerance requirements can get extremely tight, so precision becomes critical for accurate testing results.

What could go wrong if it wasn’t as precise as possible—whether due to manufacturing variances between each part or in different areas on a single component?
When testing valves or pumps, the parts need to be finished and properly worn-in. We perform cycle testing to make sure the parts can continue to perform under various operating conditions. If a valve doesn’t seat correctly, doesn’t have the proper packing, or hasn’t been worn-in correctly, then the valve can break down. If a valve like that was put into operation and it broke down because some of the tolerances were off, the results could be potentially catastrophic for that system.
Let’s say a model produced for testing meets the intended specs, but poor manufacturing processes resulted in a series of parts that don’t meet that set standard. What are the potential outcomes?
Typically, when working with a prototype, the high tolerances and level of complexity we deal with really necessitate that parts be sent to a top-rate shop if we cannot do the work in house. We may get a prototype that a client wants to mass-produce—or maybe just get certified—that would have been produced by a manufacturer or specialty machine shop. The test article that we receive would have to be machined just as precisely as the part going into service.
What if a coated or plated part has passed testing, but had developed a subsurface fracture or thin area that chipped or cracked? What could that do?
When we’re testing, we want to make sure there isn’t a potential for fatigue or possibility for failure. If there is a type of coating included in the part design that is critical to its quality, sophisticated imaging techniques may be utilized upon the completion of testing to verify that that coating has not degraded. So, when our customers turn to a manufacturer to have these items produced, a negative testing result would be on record and they would have to redesign or inspect those elements carefully after manufacturing.
Are there ever situations where you have to go back to a customer and tell them a part was of such poor quality that it required redesigning or re-evaluating the manufacturing processes?
Unfortunately, it happens quite often—especially when we’re dealing with prototypes or unique parts or initial constructions. We often find that parts are not machined properly—for instance those that aren’t flat when needed or those with usability issues—that cannot fit into a test loop or assembly. A lot of time we get parts that have to be refinished or entirely remade because they just don’t fit.
How much do unexpected errors affect the testing and manufacturing process of these parts?
There could be delays to the schedule when our clients are on a tight deadline. For Alden this can incur penalties or nominal fees for the delay itself, or we may have to work extra hours in the week to make up the delays in the schedule.
So, precision and accuracy is how we make happy engineers?
Yes—that’s a good quote.
Are there ever communication difficulties between engineers and grinders or manufacturers as far as really understanding what the other does?
There can be. Most often, engineers are there to design something—whatever that widget may be. However, the practicality of how that widget is going to go into service and how that widget is going to be constructed may elude some engineers, especially young engineers with less experience. Collaboration between engineers, manufacturers, and grinders makes for better products. It is best if an engineer is trained in machining or manufacturing, or has direct contact with an expert, such as at smaller companies like Duval where the relationships between the departments are more interconnected.

So could we assume that a shop experienced with the needs and regulations of a certain industry will have a better understanding of what’s important and how to communicate with its engineers?
Exactly. Experienced grinders, in many aspects, understand realistic tolerances and will often know what should be required from a practical standpoint, whereas an engineer might know about slip-fit, press-fit, etc. But something like “slop” can be a good thing or a bad thing. It all goes back to tolerance—when you have parts fitting together, especially moving parts, you have to ask: “Is it going to be beneficial or detrimental to have this ‘slop’ here, and why?” To give an example, I saw a valve that experienced degradation on the valve stem where the packing material itself was too tight. The shaft was machined just a little too tight to its seat and it degraded and eroded the shaft—just scored it so badly that after a brief window of operation it had to be entirely dismantled and reassembled. We’re not talking small parts here, either. We’re talking nuclear industry valves that can cost upward of $20 million in re-design, engineering, and repairs. A very high-risk part.
Is the majority of the work you see CNC or is it more of the intricate, hands-on grinding that relies on experience and feel just as much as precision and accuracy?
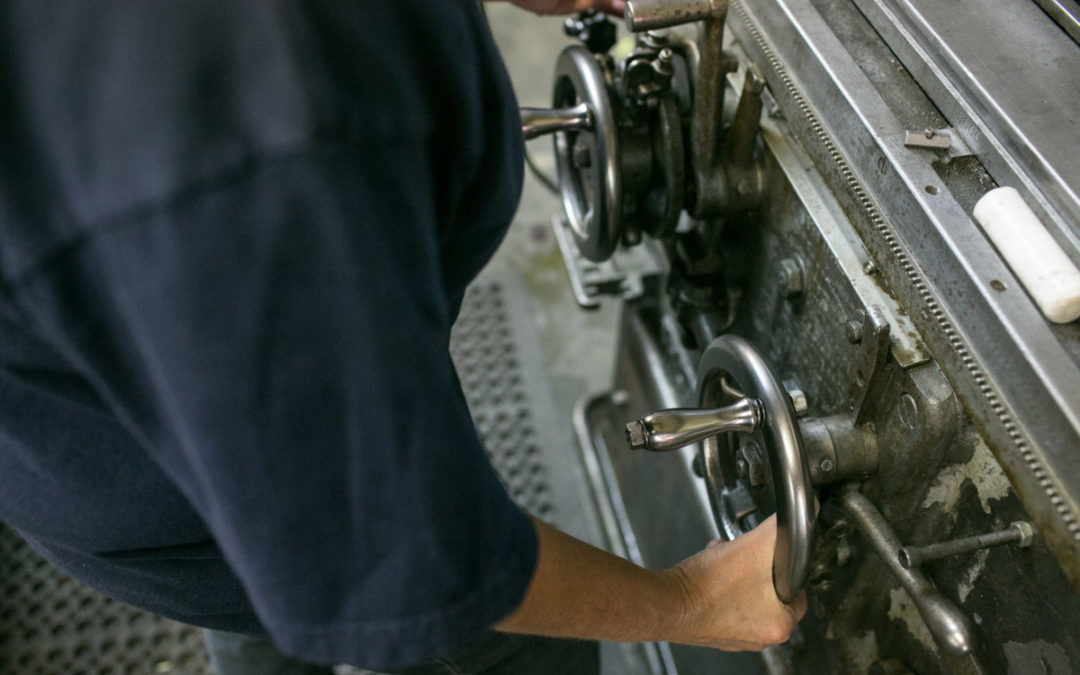
It’s absolutely a combination, especially with prototypes and one-of-a kind parts. In the initial stages of producing any part, you’ve got water-jet cut, CNC cut, hand finishing—all kinds of operations to make changes and to meet or correct any necessary tolerances. On top of that, the part may be completely hand-constructed. It really takes an artisan to make something hand-crafted in combination with CNC machining, and to know which method is most appropriate.

Do you inspect the part edges, or is that less important?
It depends what the part is—whether it has machined sharp or beveled edges. A lot of times we see beveled edges for fitting parts together. This can be critical but it depends on the function. When it comes to precision grinding, I’m a tertiary end user of those services. We have a machinist in-house who is exceptionally capable of manufacturing and finishing a lot of parts, but there is still so much that we send out to experts. If we’re making something for a test setup, our clients will contract us to send it out because they know we’ve built a database of vendors we’ve had great experiences with—and some that weren’t great experiences that we haven’t used again.
What makes a vendor experience great?
Beyond the quality of the work itself? Communication. Being able to understand exactly what we’re asking for and the ability to communicate and collaborate is key. We enjoy working with shops that do more than just read a number on an order and send it out to you whether it’s right or not. There’s a degree of care and pride in the work. And of course, price, but in the long run, high quality for a higher price is much higher value to a company than low quality at a bargain price. They know it’s an important investment where you can’t cut corners.
Why is precision critical for you?
It really comes down to what is needed and required vs. what you can do. Just because I can grind or machine down to less than a half a thousandth of an inch tolerance does not mean it’s necessary. On the engineering side, when someone says we need a certain tolerance, it’s good to look at it a second time. If there is not a need to have such precision, you can reduce your costs—but if there is a need, you can rest assured that a specified tolerance is important and that it was specified for a reason.
If you could send a message to manufacturers and grinders everywhere—the thing you wish was covered in every class and technical program—what would it be?
My favorite types of precision grinders to work with are the ones who are extremely detail oriented and are completely focused on being clear and precise on every tiny aspect of a drawing. If something is missing—a tolerance, a dimension, anything—they won’t even start on a job until it’s addressed. Creativity is helpful in the development stage of a product or test apparatus—an experienced grinder can offer ideas and work with the engineers to think through problems that might not have been considered—but focus on detail is my most valued quality in anyone working through the manufacturing and finishing process.

